The Miata showed up during COVID as a very bone-stock NA in exactly the kind of condition I like most: rough enough to be cheap, good enough to be worth saving, and just broken enough to require some effort before I could actually enjoy it. The first job was getting it through smog after chasing down a badly leaking injector, a dirty O2 sensor, and a dead catalytic converter. Once it was legal, the next problem was that it scraped constantly on my driveway, which made building another lowered Miata seem even less interesting than usual.
So instead of going lower, the project turned into an attempt to build the ultimate daily Miata: lifted, more usable, still fun, and a little weird in exactly the right way. This section covers the lift kit, tire and wheel fitment, polyurethane bushings, the custom radio mount, and the rearview camera that helped fix one of the car’s more annoying stock traits.
Lift kit and suspension
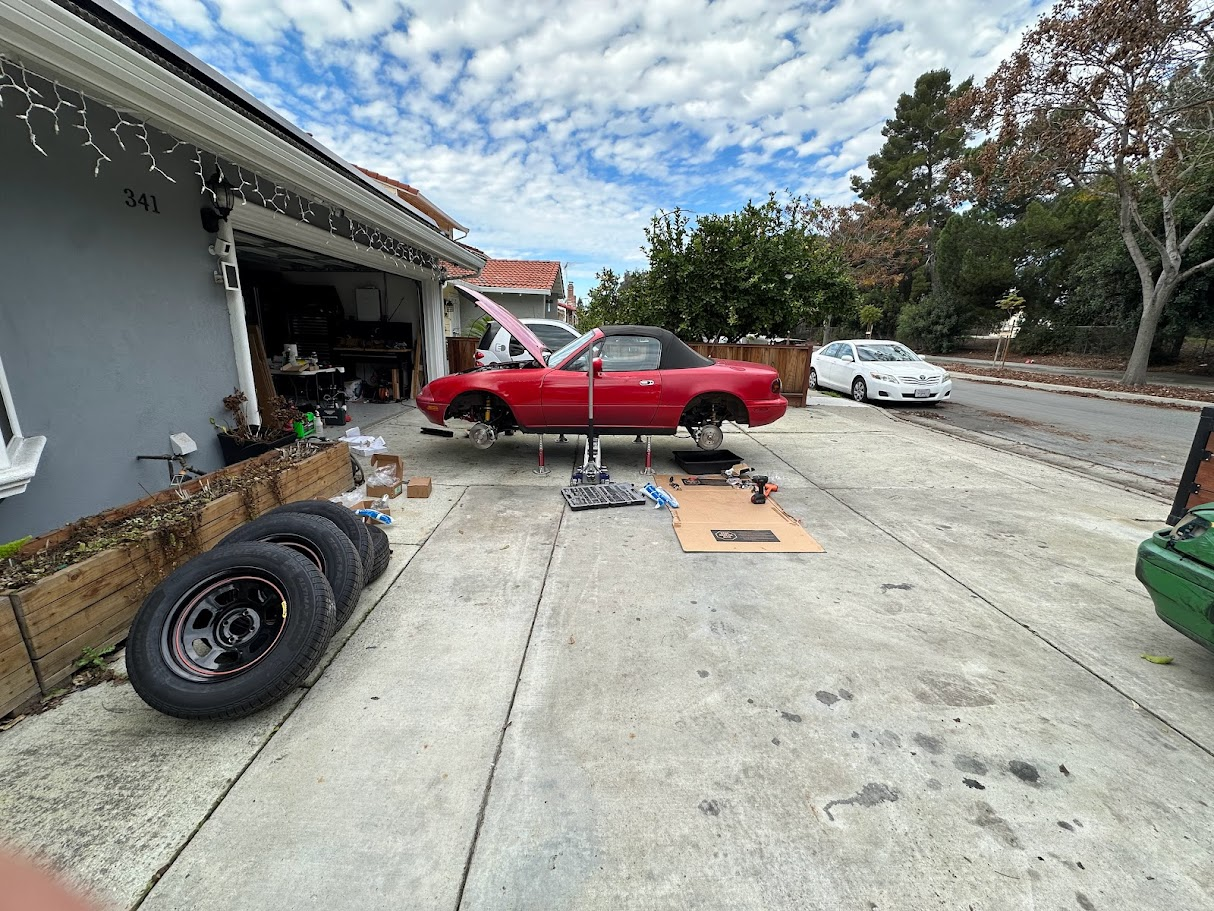
The lift kit was the point where the Miata stopped looking like a cheap NA that I had managed to get through smog and started becoming the car I actually wanted it to be. The original motivation was not particularly glamorous: it scraped constantly on my driveway, which is not something I was interested in treating as a personality trait. Instead of going down the usual lowered-Miata path, I decided to do the opposite and build something closer to an ultimate daily Miata that could handle bad pavement, steep driveways, and generally more nonsense than Mazda had originally planned for it.
The car came to me on Koni coilovers, and the core of the lift was a Paco 3-inch lift kit combined with extended lower ball joints in the front to help keep the suspension geometry from becoming a complete disaster. One interesting part of the setup is that while the car did get lifted substantially, the actual suspension travel stayed basically the same as a normal Miata, which still means only a few inches of travel in total. Even so, the handling remained remarkably good considering how much the center of gravity moved upward.

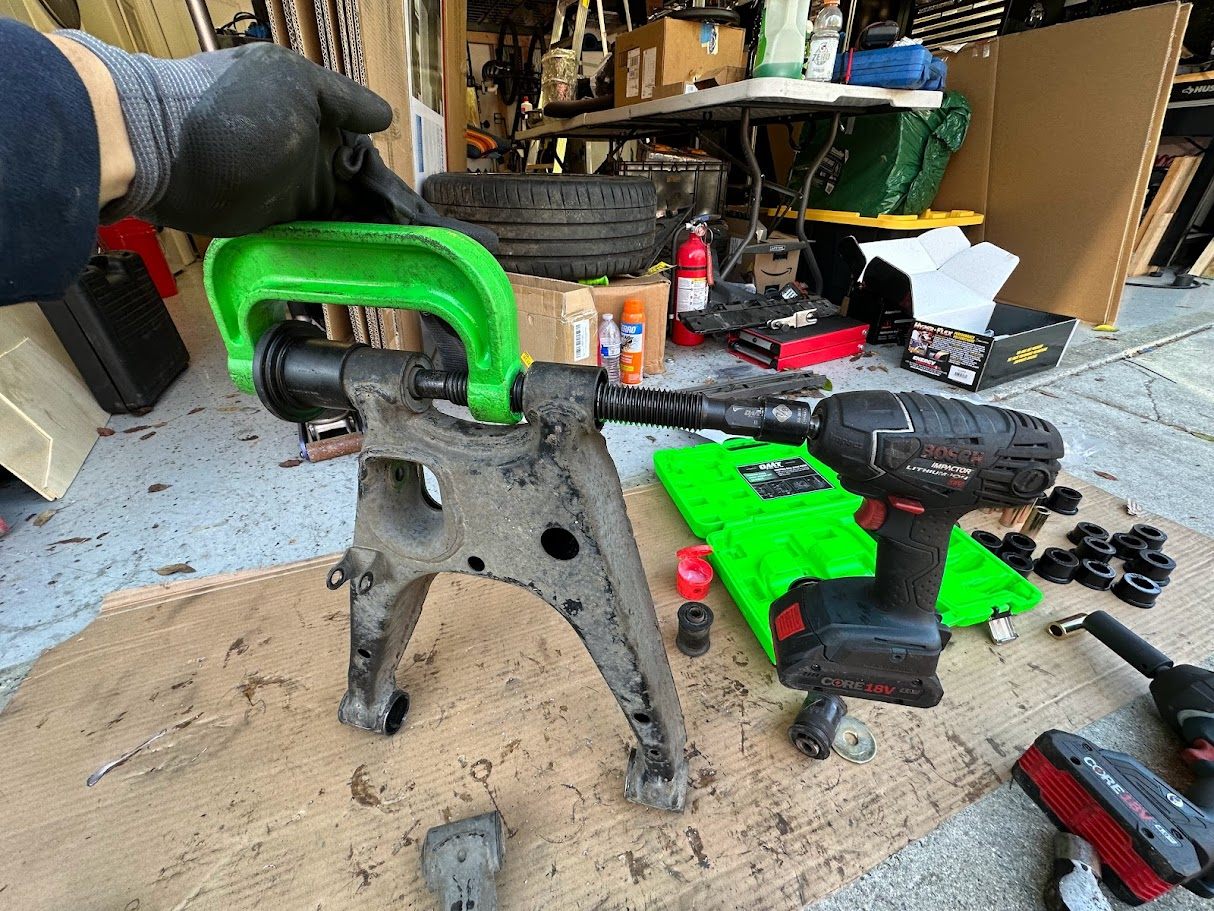
As part of the suspension refresh, I also replaced every suspension bushing with polyurethane. That did a lot to keep the car feeling tight and responsive instead of just tall. Between the lift kit and the bushings, the whole thing ended up feeling less like a novelty build and more like a coherent setup that just happened to sit much higher than any Miata is supposed to.
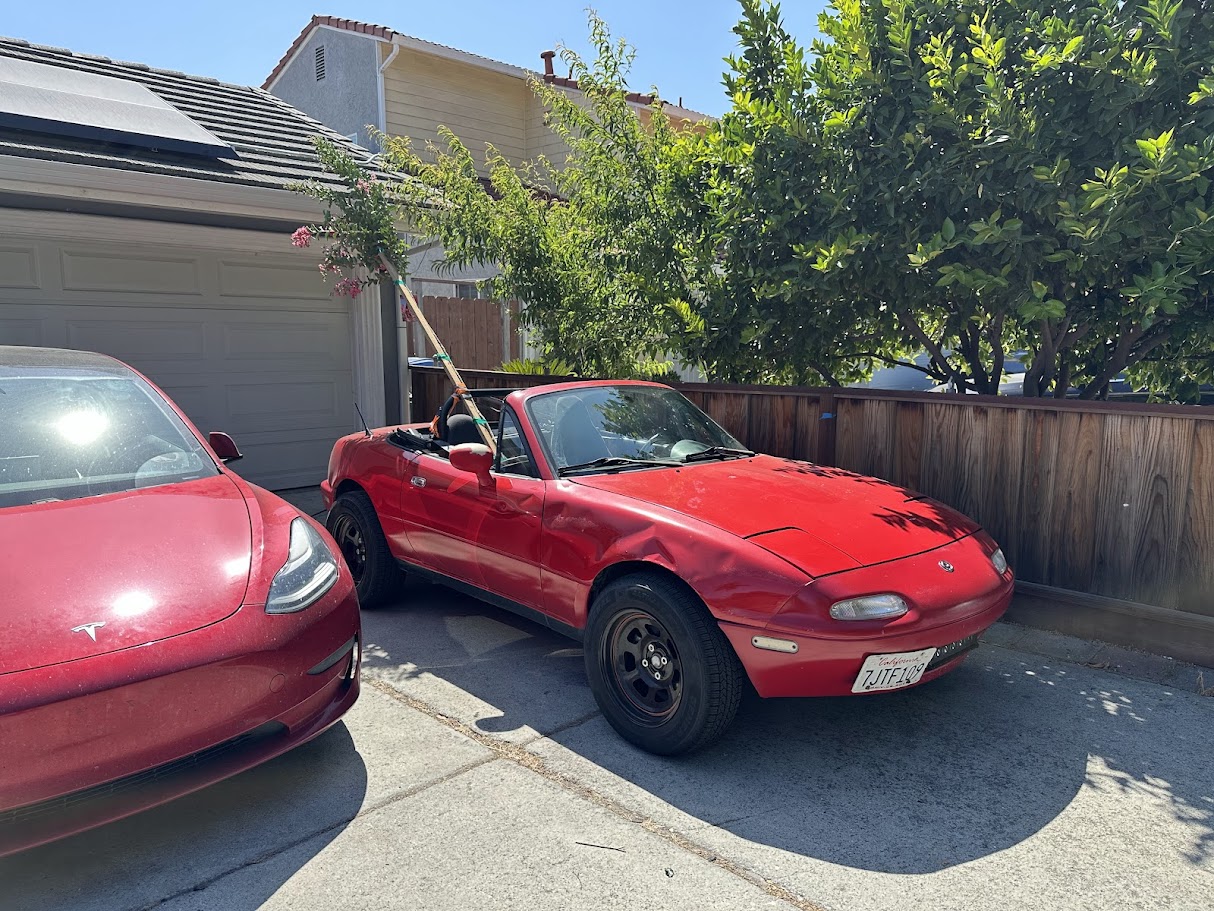
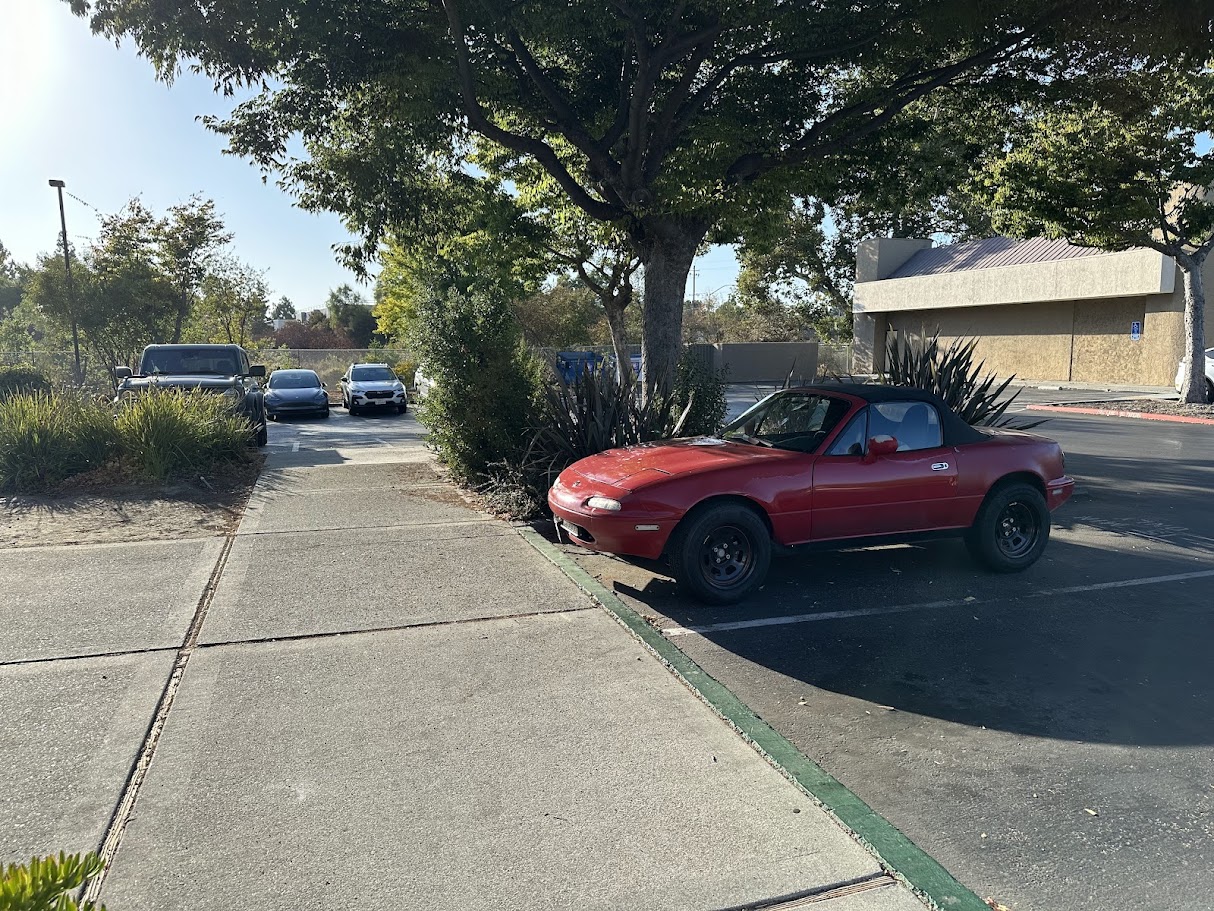
In total, the car gained about three inches from the lift kit itself, and then another two to three inches from the larger tire diameter. The end result is roughly 12 inches of ground clearance, which is frankly absurd on an NA. It still rubs at full lock, and as it gets close to the bump stops it will also touch the front fenders, so it is not pretending to be factory-perfect. But the car looks amazing, somewhere between an NA Miata and a tiny dune buggy, and it can clear things that would have been laughable with a normal ride height.
Wheel and tire fitment
A big part of the final look and ride height of the Miata came from the wheel and tire choice, not just the lift kit. The setup I ended up with is a 205/65R15 tire on 15-inch steel wheels with zero offset. That is not exactly standard Miata fitment, which is part of why it worked for the kind of car I was trying to build.
The taller tire diameter adds another major chunk of ride height on top of the Paco lift, which is how the car ended up with such a ridiculous overall ground-clearance number. It also changes the visual proportion of the car in a way I like a lot. Instead of looking like another lowered street car, it ends up looking more like a miniature off-road toy that somehow still has pop-up headlights.

The fitment is not without compromise. At full lock, it definitely rubs, and near the bump stops it will also contact the front fenders. So this is not a story about perfect OEM-level packaging. It is more a story about choosing a combination that looks right, works well enough, and gives the car the kind of stance and usability I wanted. In practice, that has been more than worth it.
Custom radio mount
The radio project was mostly about fixing two problems at once: getting a head unit that still looked period-correct in the dash, and building a shelf layout that was actually useful. The head unit itself is just a Continental unit chosen because it suits the car visually while still giving me the modern conveniences I actually wanted, namely USB and Bluetooth. That part was easy. The annoying part was that every available mounting adapter looked a little wrong, and most shelf options were too shallow to be truly useful.
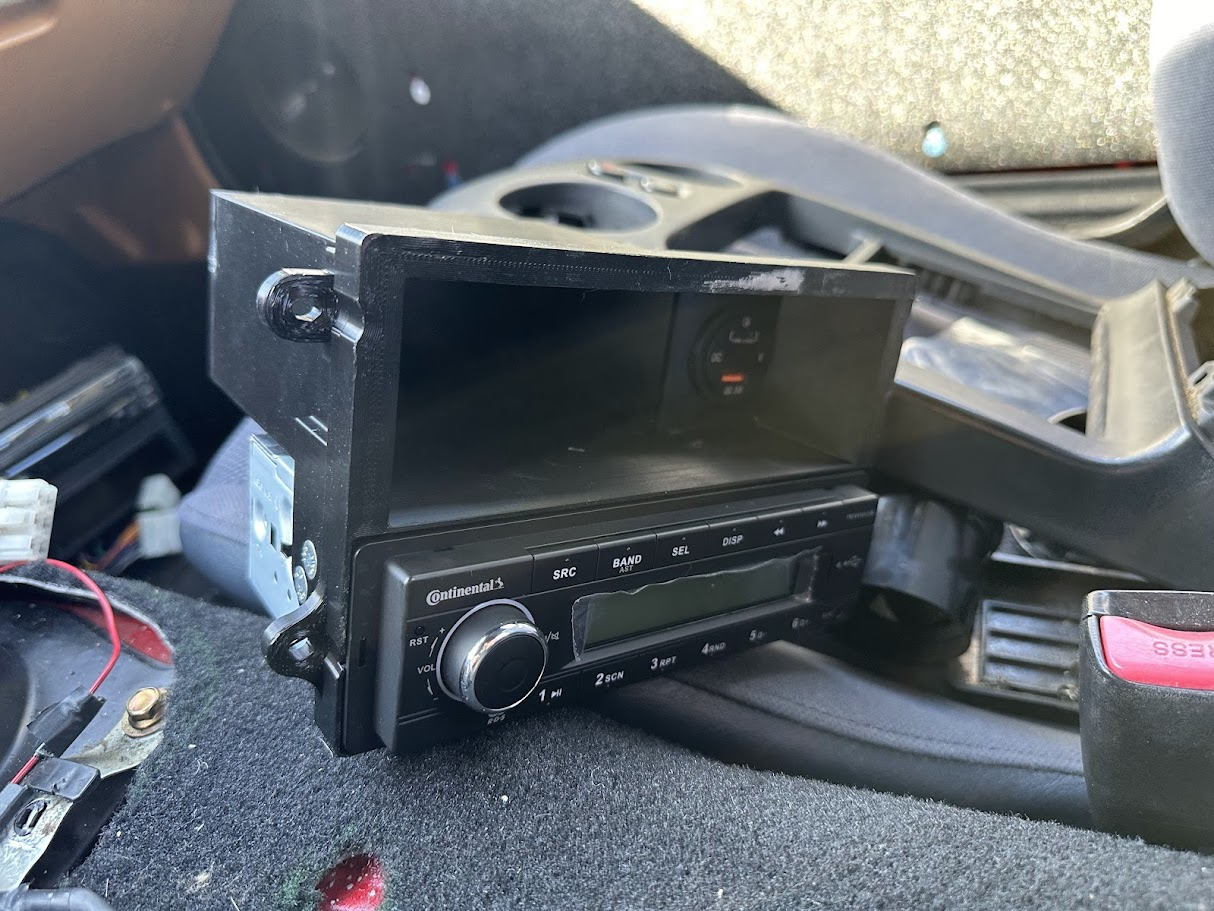
The stock-style arrangement with the shelf below the head unit also had an ergonomic problem. Reaching into that lower shelf means working around the shifter, which makes it less useful than it looks. So instead I designed a custom adapter and 3D printed it so the shelf would sit above the head unit instead of below it. That also gave me the freedom to make the shelf much deeper than the usual options, about six inches deep instead of the two or three inches most of the available parts seemed to offer.
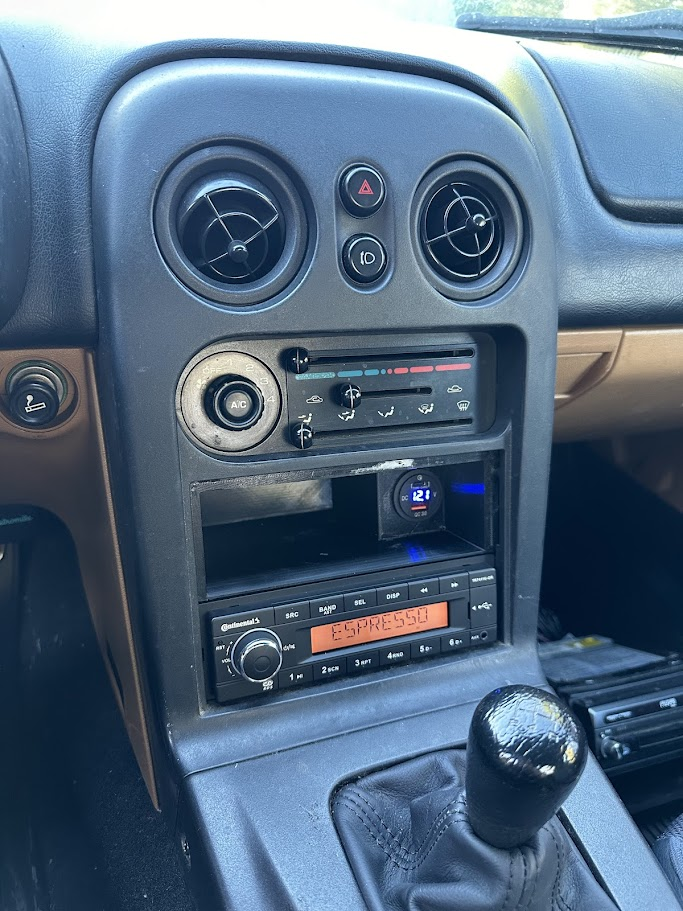
That deeper shelf is big enough to hold a full-length iPhone, which makes it actually useful rather than just decorative. The printed adapter also integrates a mount for a battery voltage gauge along with a USB-C charge port, so the whole assembly ended up doing several jobs at once without looking too out of place in the car. It is a small project, but one of those details that makes the Miata feel a lot more thought through every time I drive it.
Rearview camera and digital mirror
The rearview camera started with a problem every NA Miata owner already knows about: rearward visibility is not very good, especially with the top up, and the cloudy plastic rear window does not help. Even when the rear window is too hazy to really see through, headlights from taller vehicles still manage to blast straight through and make the mirror unpleasant at night. I wanted something that actually improved visibility without looking like an afterthought bolted onto the outside of the car.
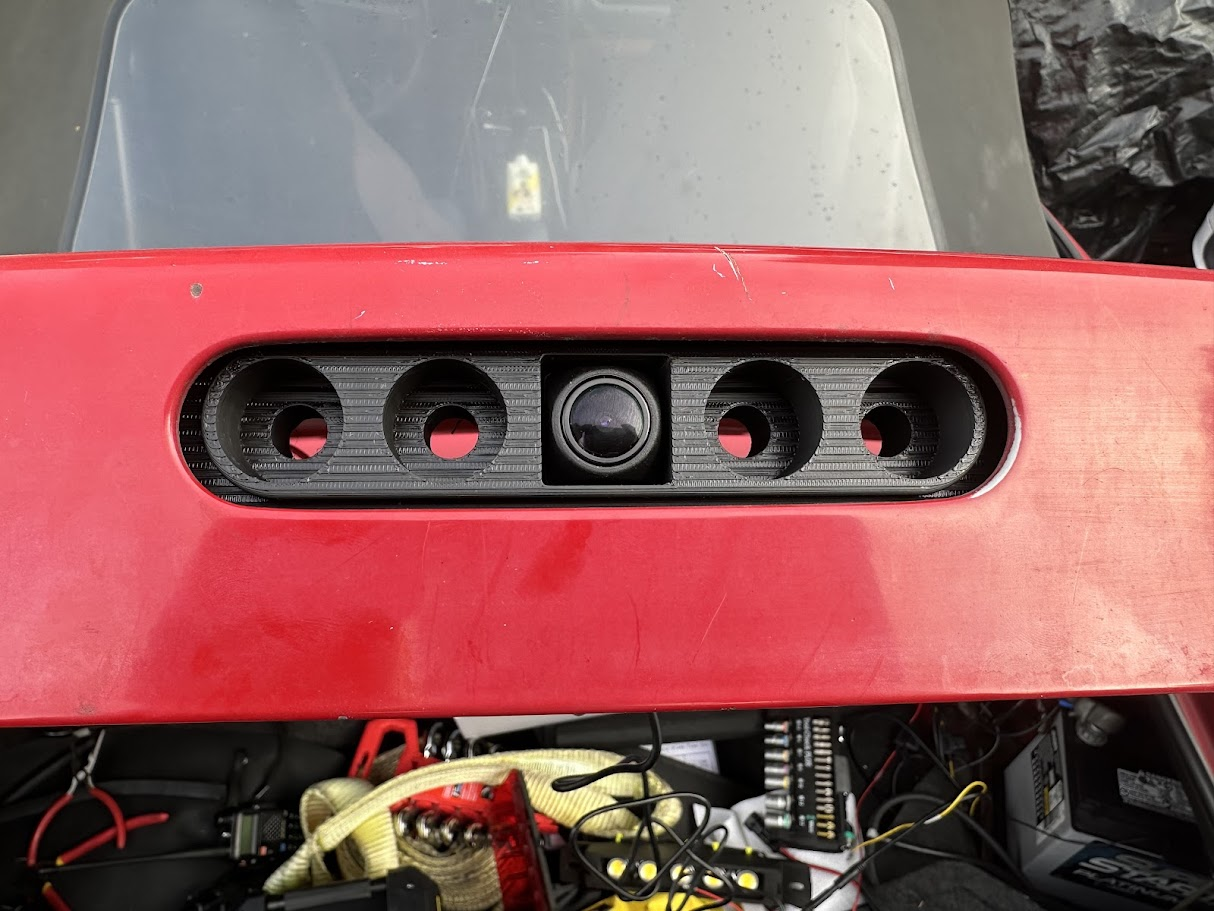
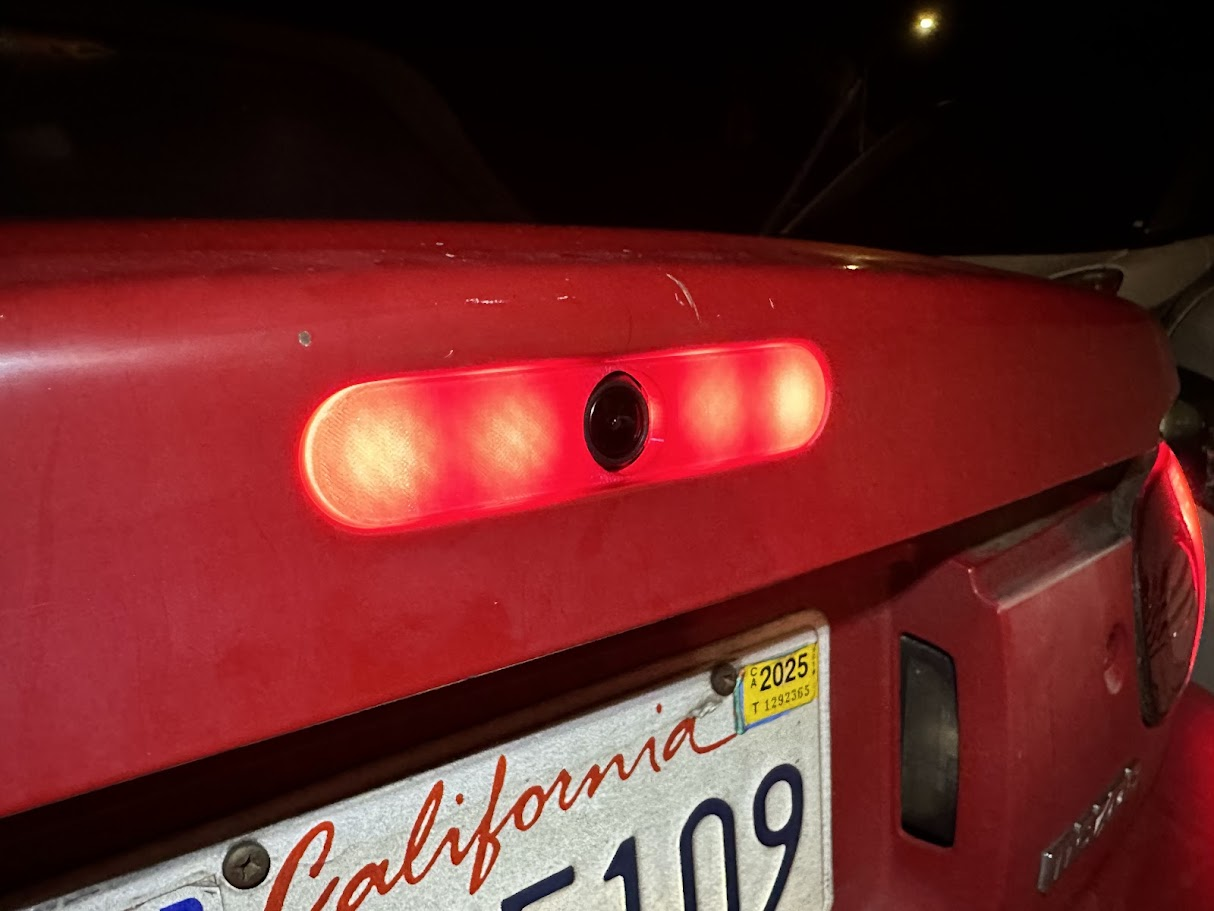
I specifically did not want a camera stuck awkwardly above the license plate or a hole punched through the bumper. Instead, I integrated the camera into the third brake light so it would feel much more seamless. To make that work, I 3D printed the parts needed for the camera housing, the brake light structure, and the lens. That also gave me the opportunity to fit brighter and larger LED bulbs into the third brake light, which improved visibility and safety at the same time.
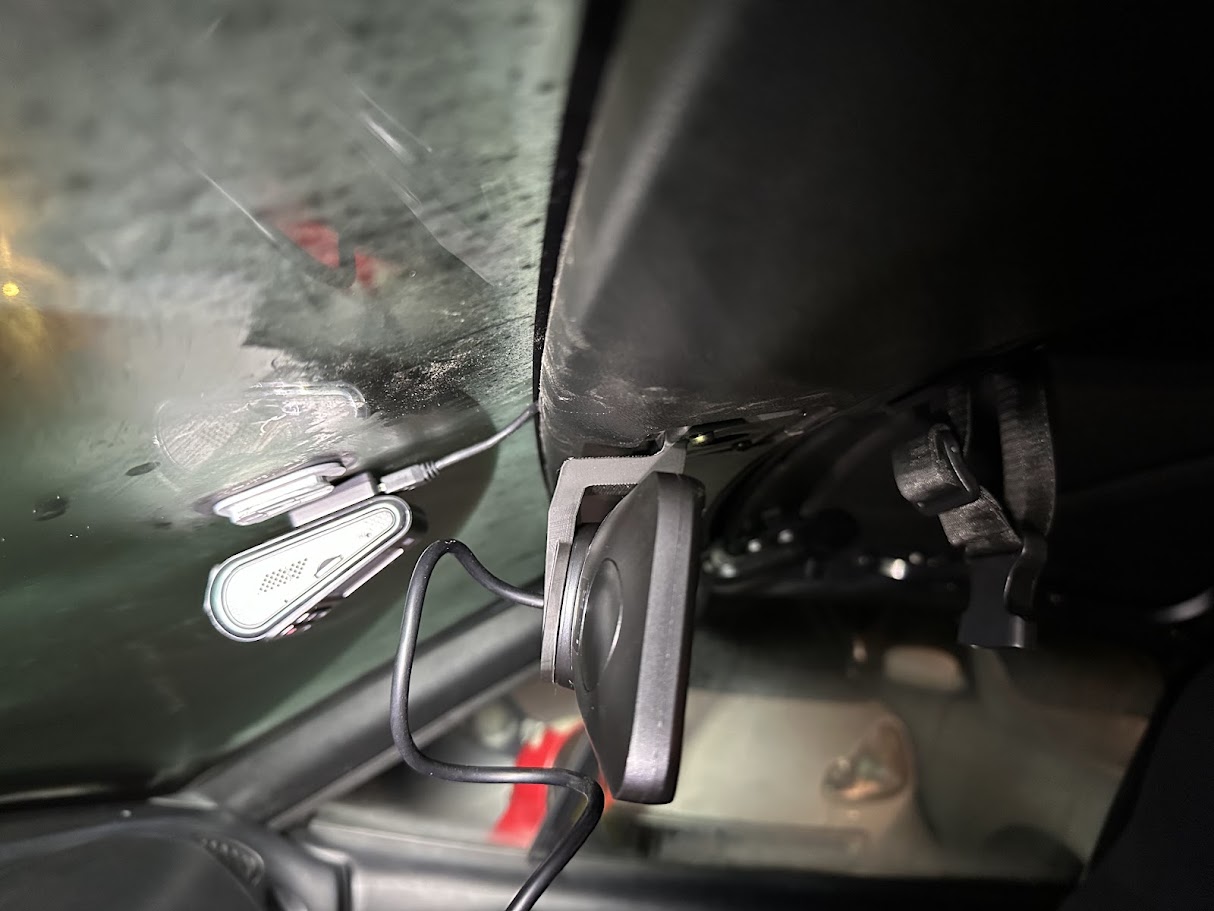
Inside the car, the display is not a conventional mirror with a small screen hidden inside it. It is a full-time display shaped like a rearview mirror that replaces the original mirror entirely. I also 3D printed the parts needed to mount it cleanly. The result is that the car always has a clear digital rear view instead of relying on whatever limited visibility the original mirror and rear window were willing to offer that day.
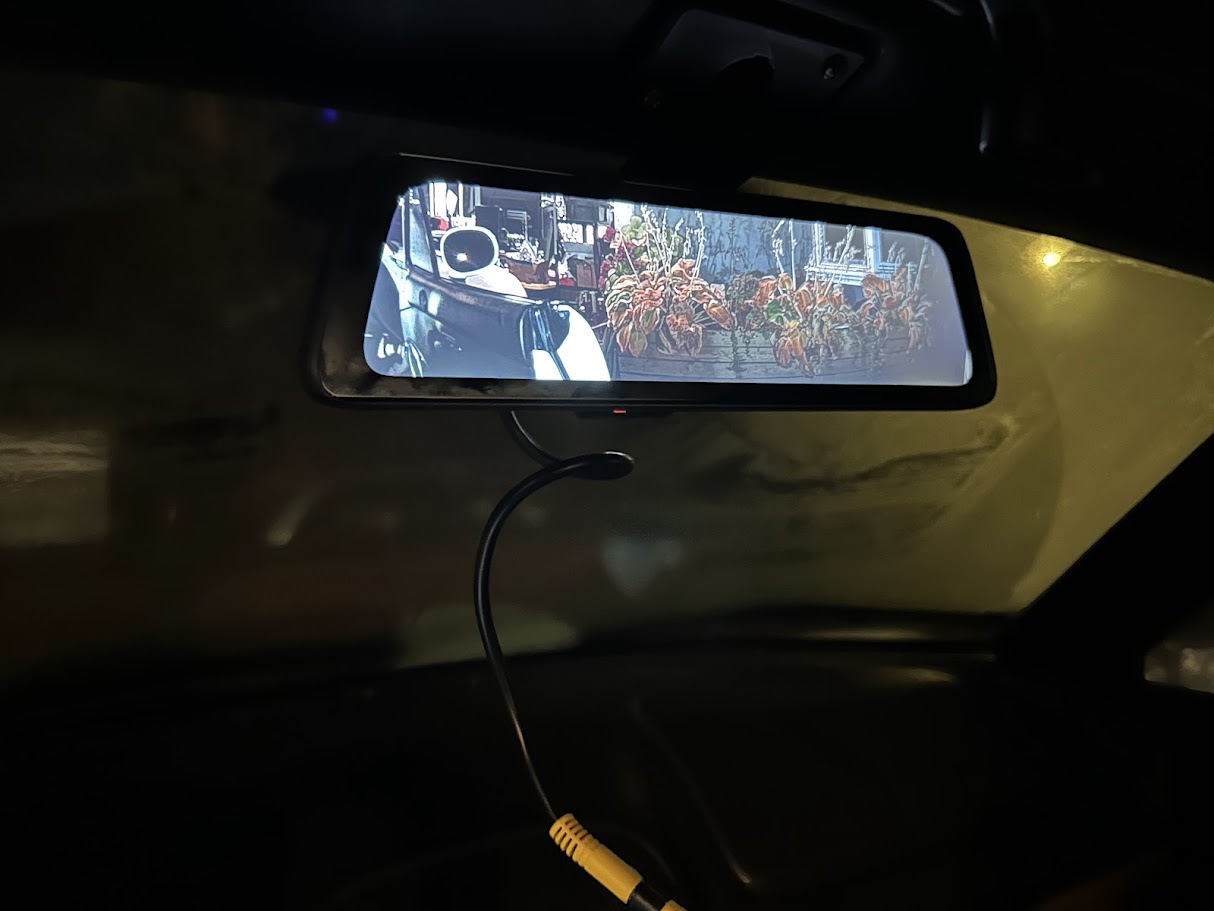
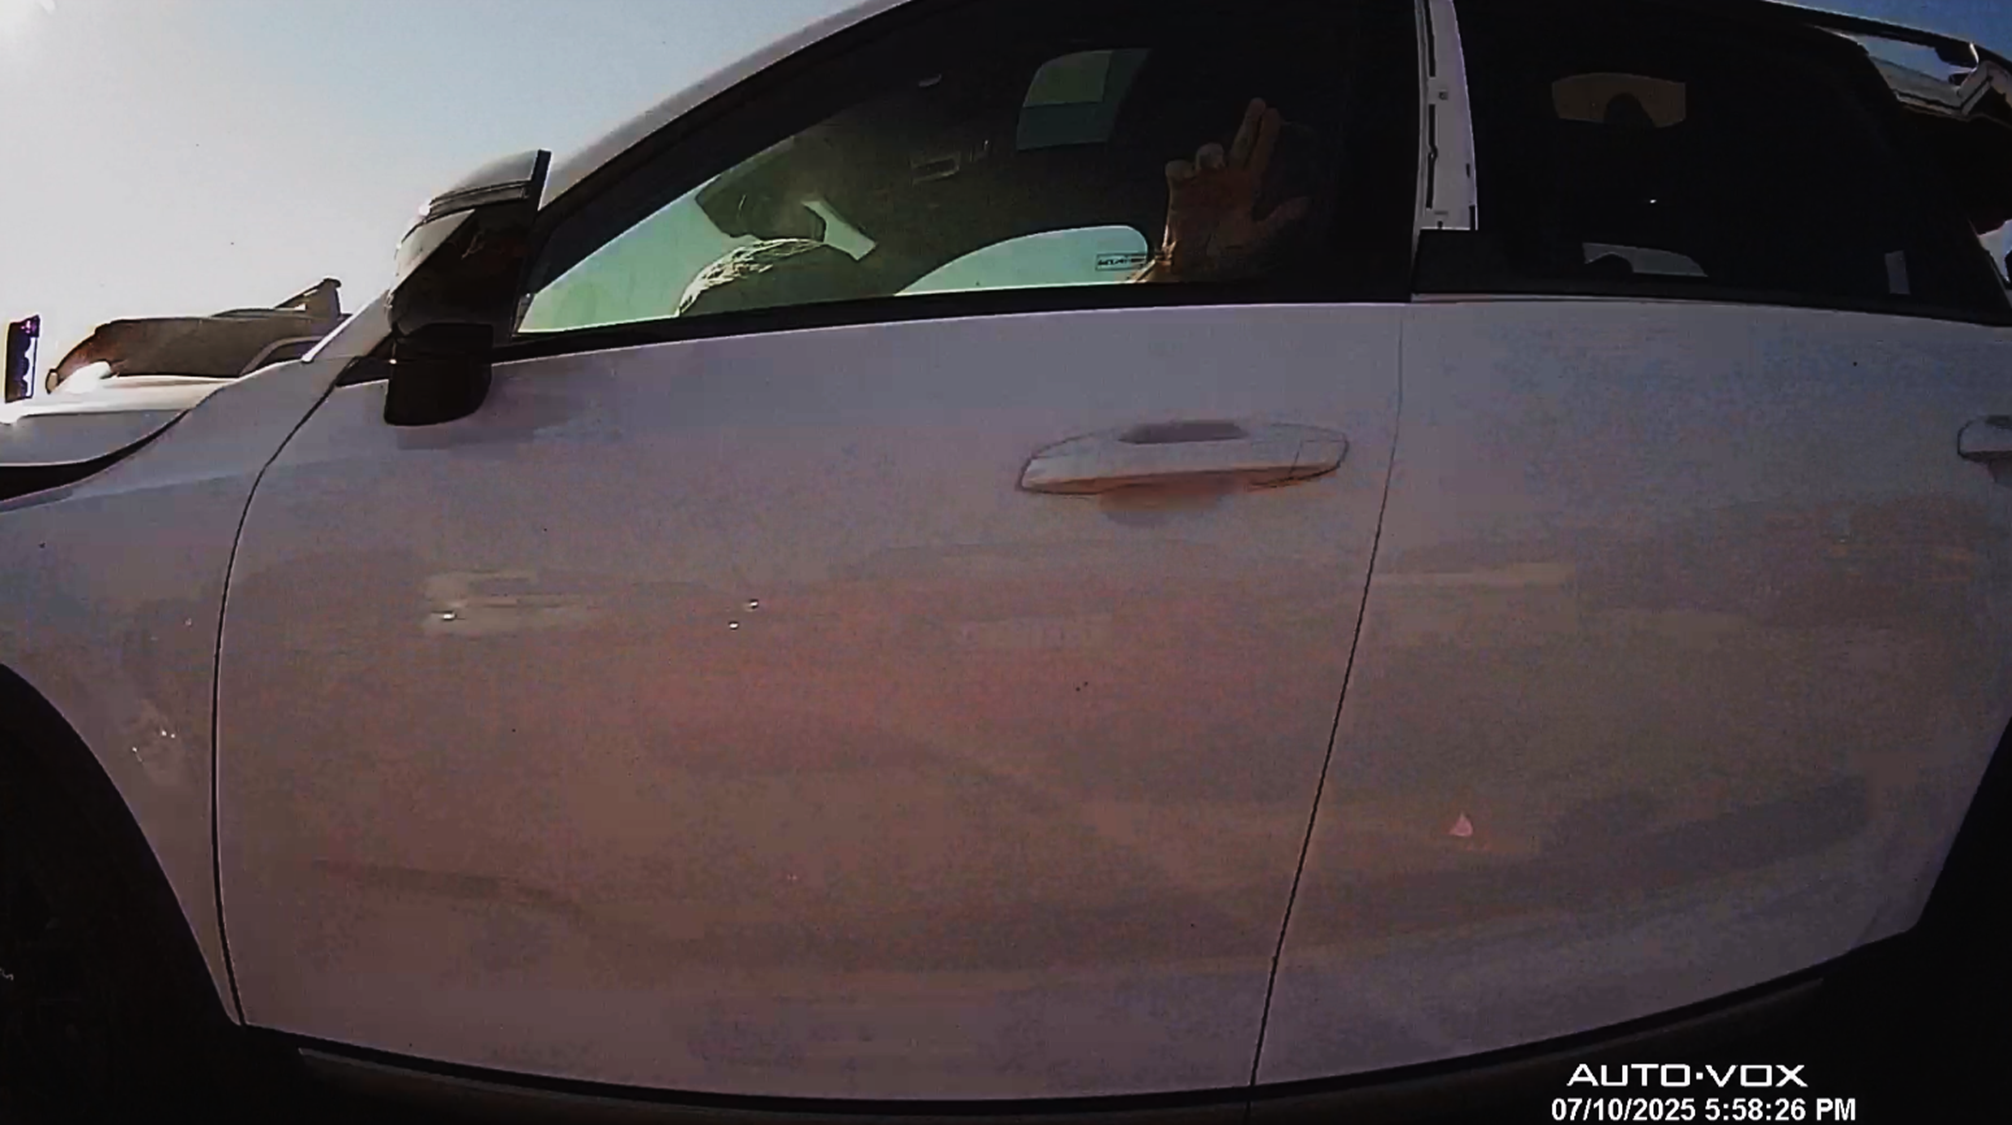
In practice, it solved more problems than I originally expected. It gives a much clearer rear view with the top up, it no longer blinds me at night because the camera can control exposure properly, and it also doubles as a dash cam. That turned out to be extremely useful in at least one close-call incident where another car very nearly collected the Miata, and the footage clearly showed it approaching in the background. Like the radio mount, it is one of those projects that ended up making the car feel much more usable without giving up the weird charm of an old Miata.